jMonkeyEngine SDK: Material Editor
If you are looking for background information, read about Material Definitions and j3M Material Files. You can write .j3m files in a text editor, or use the jMonkeyEngine SDK to generate them for you as described in this article.
Materials
The jMonkeyEngine uses a special Material format, which comes in .j3m files. You use .j3m files to store sets of material properties that you use repeatedly. This enables you write one short line of code that simply loads the presets from a custom .j3m file. Without a .j3m file you need to write several lines of material property setters every time when you want to use a non-default material.
Creating .j3m Materials
To create new .j3m files in the jMonkeyEngine SDK:
-
RMB select the
assets/Materialsdirectory and choose. -
In the New File Wizard, choose
, and click Next. -
Give the file a name, for example
mat_wallfor a wall material. -
A new file
mat_wall.j3mis created in the Materials directory and opens in the Material Editor.
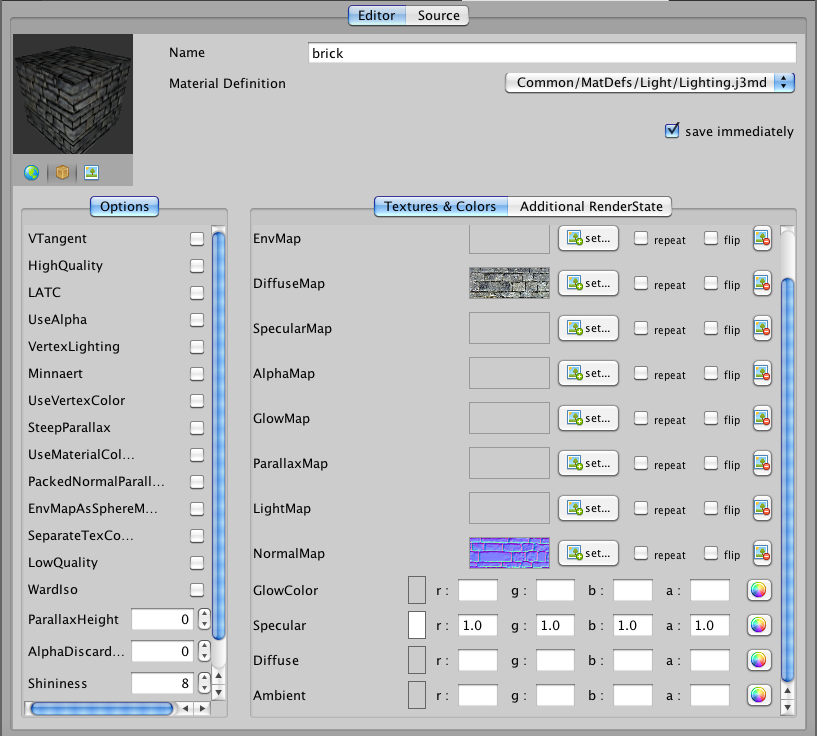
You can edit the source of the material, or use the user-friendly visual editor to set the properties of the material. Set the properties to the same values as you would otherwise specify with setters on a Material object in Java code:
Material mat_wall = new Material(
    assetManager, "Common/MatDefs/Light/Lighting.j3md");
mat_wall.setTexture("DiffuseMap",
    assetManager.loadTexture("Textures/wall_diffuse.png"));
mat_wall.setTexture("NormalMap",
    assetManager.loadTexture("Textures/wall_normals.png"));
mat_wall.setFloat("Shininess", 5f);
This Java code corresponds to the following .j3m file:
Material my brick wall : Common/MatDefs/Light/Lighting.j3md {
  MaterialParameters {
    DiffuseMap: Repeat Textures/wall_diffuse.png
    NormalMap:  Repeat Textures/wall_normals.png
    Shininess: 5.0
  }
}
You can modify the source code of the j3m file in the “source” tab of the Material Editor.
Using .j3m Materials
When the material is ready and saved into your projects assets directory, you can assign the .j3m to a Geometry.
In the jMonkeyEngine SDK
-
RMB select the j3o file and choose
Edit in SceneComposer. -
You can open the SceneExplorer window by selecting
from the menu bar, if it’s not already open. -
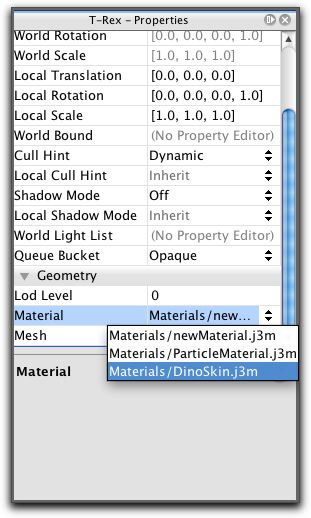
In the SceneExplorer, click the geometry to which you want to assign the material.
-
Open the Properties window.
-
Assign the .j3m material to the .j3o in the
section.If the .j3o file already has a material assigned to it from exporting/importing, you can generate the material by selecting “create j3m file” instead. This will place a .j3m under assets/Materials/Generatedand assign it to your .j3o. -
Save the j3o and load it into you game.
Or in your Java code
-
Use a loader and a setter to assign the material to a Geometry.
mywall.setMaterial(assetManager.loadMaterial( "Materials/mat_wall.j3m"));See also: