jMonkeyEngine 3 Tutorial (7) - Hello Animation
This tutorial shows how to add an animation controller and channels, and how to respond to user input by triggering an animation in a loaded model.
|
To use the example assets in a new jMonkeyEngine SDK project, right-click your project, select , and add the “jme3-test-data” library. |
Sample Code
package jme3test.helloworld;

import com.jme3.animation.AnimChannel;
import com.jme3.animation.AnimControl;
import com.jme3.animation.AnimEventListener;
import com.jme3.animation.LoopMode;
import com.jme3.app.SimpleApplication;
import com.jme3.input.KeyInput;
import com.jme3.input.controls.ActionListener;
import com.jme3.input.controls.KeyTrigger;
import com.jme3.light.DirectionalLight;
import com.jme3.math.ColorRGBA;
import com.jme3.math.Vector3f;
import com.jme3.scene.Node;

/** Sample 7 - how to load an OgreXML model and play an animation,
 * using channels, a controller, and an AnimEventListener. */
public class HelloAnimation extends SimpleApplication
  implements AnimEventListener {
  private AnimChannel channel;
  private AnimControl control;
  Node player;
  public static void main(String[] args) {
    HelloAnimation app = new HelloAnimation();
    app.start();
  }

  @Override
  public void simpleInitApp() {
    viewPort.setBackgroundColor(ColorRGBA.LightGray);
    initKeys();
    DirectionalLight dl = new DirectionalLight();
    dl.setDirection(new Vector3f(-0.1f, -1f, -1).normalizeLocal());
    rootNode.addLight(dl);
    player = (Node) assetManager.loadModel("Models/Oto/Oto.mesh.xml");
    player.setLocalScale(0.5f);
    rootNode.attachChild(player);
    control = player.getControl(AnimControl.class);
    control.addListener(this);
    channel = control.createChannel();
    channel.setAnim("stand");
  }

  public void onAnimCycleDone(AnimControl control, AnimChannel channel, String animName) {
    if (animName.equals("Walk")) {
      channel.setAnim("stand", 0.50f);
      channel.setLoopMode(LoopMode.DontLoop);
      channel.setSpeed(1f);
    }
  }

  public void onAnimChange(AnimControl control, AnimChannel channel, String animName) {
    // unused
  }

  /** Custom Keybinding: Map named actions to inputs. */
  private void initKeys() {
    inputManager.addMapping("Walk", new KeyTrigger(KeyInput.KEY_SPACE));
    inputManager.addListener(actionListener, "Walk");
  }
  private ActionListener actionListener = new ActionListener() {
    public void onAction(String name, boolean keyPressed, float tpf) {
      if (name.equals("Walk") && !keyPressed) {
        if (!channel.getAnimationName().equals("Walk")) {
          channel.setAnim("Walk", 0.50f);
          channel.setLoopMode(LoopMode.Loop);
        }
      }
    }
  };
}
Creating and Loading Animated Models
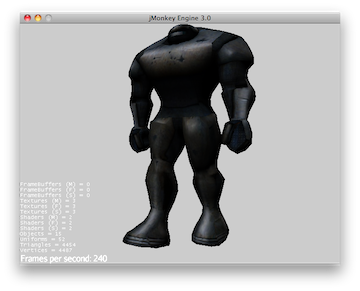
You create animated models with a tool such as Blender. Take some time and learn how to create your own models in these Blender Animation Tutorials. For now, download and use a free model, such as the one included here as an example (Oto Golem, and Ninja).
Loading an animated model is pretty straight-forward, just as you have learned in the previous chapters. Animated Ogre models come as a set of files: The model is in Oto.mesh.xml, and the animation details are in Oto.skeleton.xml, plus the usual files for materials and textures. Check that all files of the model are together in the same Model subdirectory.
  public void simpleInitApp() {
    /* Displaying the model requires a light source */
    DirectionalLight dl = new DirectionalLight();
    dl.setDirection(new Vector3f(-0.1f, -1f, -1).normalizeLocal());
    rootNode.addLight(dl);
    /* load and attach the model as usual */
    player = assetManager.loadModel("Models/Oto/Oto.mesh.xml");
    player.setLocalScale(0.5f); // resize
    rootNode.attachChild(player);
    ...
    }
Don’t forget to add a light source to make the material visible.
Animation Controller and Channel
After you load the animated model, you register it to the Animation Controller.
-
The controller object gives you access to the available animation sequences.
-
The controller can have several channels, each channel can run one animation sequence at a time.
-
To run several sequences, you create several channels, and set them each to their animation.
  private AnimChannel channel;
  private AnimControl control;

  public void simpleInitApp() {
    ...
    /* Load the animation controls, listen to animation events,
     * create an animation channel, and bring the model in its default position.
     */
    control = player.getControl(AnimControl.class);
    control.addListener(this);
    channel = control.createChannel();
    channel.setAnim("stand");
    ...
}
This line of code will return NULL if the AnimControl is not in the main node of your model.
control = player.getControl(AnimControl.class);To check this, RMB select your model and click “Edit in SceneComposer” if the models file extension is .j3o, or “View” if not. You can then see the tree for the model so you can locate the node the control resides in. You can access the subnode with the following code.
player.getChild("Subnode").getControl(AnimControl.class);|
In response to a question about animations on different channels interfering with each other, Nehon, on the jME forum wrote,
— Nehon
Team Leader: Retired |
Responding to Animation Events
Add implements AnimEventListener to the class declaration. This interface gives you access to events that notify you when a sequence is done, or when you change from one sequence to another, so you can respond to it. In this example, you reset the character to a standing position after a Walk cycle is done.
public class HelloAnimation extends SimpleApplication
                         implements AnimEventListener {
  ...

  public void onAnimCycleDone(AnimControl control,
                              AnimChannel channel, String animName) {
    if (animName.equals("Walk")) {
      channel.setAnim("stand", 0.50f);
      channel.setLoopMode(LoopMode.DontLoop);
      channel.setSpeed(1f);
    }
  }
  public void onAnimChange(AnimControl control, AnimChannel channel, String animName) {
    // unused
  }
 ...
}
Trigger Animations After User Input
There are ambient animations like animals or trees that you may want to trigger in the main event loop. In other cases, animations are triggered by user interaction, such as key input. You want to play the Walk animation when the player presses a certain key (here the spacebar), at the same time as the avatar performs the walk action and changes its location.
-
Initialize a new input controller (in
simpleInitApp()).-
Write the
initKey()convenience method and call it fromsimpleInitApp().
-
-
Add a key mapping with the name as the action you want to trigger.
-
Here for example, you map
Walkto the Spacebar key.
-
-
Add an input listener for the
Walkaction.
  private void initKeys() {
    inputManager.addMapping("Walk", new KeyTrigger(KeyInput.KEY_SPACE));
    inputManager.addListener(actionListener, "Walk");
  }
To use the input controller, you need to implement the actionListener by testing for each action by name, then set the channel to the corresponding animation to run.
-
The second parameter of setAnim() is the blendTime (how long the current animation should overlap with the last one).
-
LoopMode can be Loop (repeat), Cycle (forward then backward), and DontLoop (only once).
-
If needed, use channel.setSpeed() to set the speed of this animation.
-
Optionally, use channel.setTime() to Fast-forward or rewind to a certain moment in time of this animation.
  private ActionListener actionListener = new ActionListener() {
    public void onAction(String name, boolean keyPressed, float tpf) {
        if (name.equals("Walk") && !keyPressed) {
            if (!channel.getAnimationName().equals("Walk")){
                channel.setAnim("Walk", 0.50f);
                channel.setLoopMode(LoopMode.Cycle);
            }
        }
    }
  };
Exercises
Exercise 1: Two Animations
Make a mouse click trigger another animation sequence!
-
Create a second channel in the controller.
-
Create a new key trigger mapping and action. (see: Hello Input)
Do you want to find out what animation sequences are available in the model?
Use:
for (String anim : control.getAnimationNames()) {
    System.out.println(anim);
}
Exercise 2: Revealing the Skeleton (1)
Open the skeleton.xml file in a text editor of your choice. You don’t have to be able to read or write these xml files (Blender does that for you) – but it is good to know how skeletons work. There’s no magic to it!
-
Note how the bones are numbered and named. All names of animated models follow a naming scheme.
-
Note the bone hierarchy that specifies how the bones are connected.
-
Note the list of animations: Each animation has a name, and several tracks. Each track tells individual bones how and when to transform. These animation steps are called keyframes.
Exercise 3: Revealing the Skeleton (2)
Add the following import statements for the SkeletonDebugger and Material classes:
     import com.jme3.scene.debug.SkeletonDebugger;
     import com.jme3.material.Material;
Add the following code snippet to simpleInitApp() to make the bones (that you just read about) visible!
     SkeletonDebugger skeletonDebug =
         new SkeletonDebugger("skeleton", control.getSkeleton());
     Material mat = new Material(assetManager, "Common/MatDefs/Misc/Unshaded.j3md");
     mat.setColor("Color", ColorRGBA.Green);
     mat.getAdditionalRenderState().setDepthTest(false);
     skeletonDebug.setMaterial(mat);
     player.attachChild(skeletonDebug);
Can you identify individual bones in the skeleton?
Conclusion
Now you can load animated models, identify stored animations, and trigger animations by using onAnimCycleDone() and onAnimChange(). You also learned that you can play several animations simultaneously, by starting each in a channel of its own. This could be useful if you ever want to animate the lower and upper part of the characters body independently, for example the legs run, while the arms use a weapon.