jMonkeyEngine SDK: Sample Code
You can run example code by opening an included JME3Tests project and included assets. You can also search the built-in documentation or drag and drop code snippets from the Palette in the SDK to get short code sample.
Code Palette and Samples in the SDK
-
Type a keyword into the search box in the SDK or press F1 to search the built-in help for sample code.
The JME3Tests Project Template
The jMonkeyEngine SDK contains a Test Project with lots of sample code and assets. The Test Project is all set up and ready to run, and it’s easy to use for beginners (no need to mess with classpaths or libraries).
-
Install and Open the jMonkeyEngine SDK.
-
Go to
. -
In the New Project Wizard, select
JME3 Testsfrom theJME3category. ClickNext. -
Specify a location, e.g. create a jMonkeyProjects directory in your home directory. Click
Finish.
This default project template creates a project called JmeTests. It contains all test classes and examples from the jme3 source repository. Feel free to modify the code samples and experiment! In the unlikely event that you should break the project,  you can always recreate all packaged samples by creating another project from the New Project wizard’s
 JME3 Tests template.
If you’re using the 3.1.0-Stable+ version of the SDK, you will need to set the Source/Binary Format from the Project Properties window to Java 1.7 or later.
-
To change the source,
RMBselect the jmeTestProject and then select, or from the File menu, with the jmeTestProject selected,.
You will also need to remove the jme3-jbullet library and add jme3-bullet and jme3-bullet-native libraries.
-
From the
Project Propertieswindow selectLibrariesand then theCompiletab. UnderCompile-time Librariesselectjme3-jbulletand pressRemove. PressAdd Library, select the two librariesjme3-bulletandjme3-bullet-nativewhile holding Ctrl and then pressAdd Libraryand finallyOK.
|
Press Shift + F6 to run a class that is open in the editor, or |
JME3TestData Assets
You may want access to some sample assets, such as 3D models or textures, in one of your projects. A common situation for this would be while going through the beginner tutorials.
-
RMB select an existing jME3 project in the SDK, and select Properties.
-
In the Properties window, select the
Librariessection. Go to theCompiletab, it containsCompile-time Libraries. -
Click the Add Library button and select the pre-defined
jme3-test-data. Click OK. -
Click OK to save and close the Properties.
The project’s assetManager now has access to sample files from the jme3-test-data.jar file. This JAR library contains
-
Ogre XML Models: Ninja.mesh.xml, Oto.mesh.xml, HoverTank.mesh.xml, Sinbad.mesh.xml, and many more
-
Blender models
-
Materials and Textures
-
Terrain, sky, rock, brick, pond…
-
Particle effect textures
-
-
Sounds
-
And more…
AssetPacks
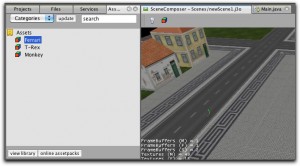
If you need sample 3D models, don’t miss the opportunity to download our community-provided Asset Packs!
In the SDK:
-
Open the AssetPackBrowser from the Windows menu
-
In the AssetPackBrowser, click the Online AssetPacks button
-
Click Install on the AssetPack of your choice. The SDK downloads it and makes the assets accessible in your AssetPack Library.
-
Click the View Library button and open the Assets node.
-
RMB select an asset to
-
Preview it
-
Add it to the SceneComposer
-
Add it to a game project’s assets directory
-