jMonkeyEngine 3 Tutorial (9) - Hello Collision
This tutorial demonstrates how you load a scene model and give it solid walls and floors for a character to walk around.
You use a RigidBodyControl for the static collidable scene, and a CharacterControl for the mobile first-person character. You also learn how to set up the default first-person camera to work with physics-controlled navigation.
You can use the solution shown here for first-person shooters, mazes, and similar games.
Sample Code
If you don’t have it yet, Download the town.zip sample scene.
jMonkeyProjects$ ls -1 BasicGame
assets/
build.xml
town.zip
src/
Place town.zip in the root directory of your JME3 project. Here is the code:
package jme3test.helloworld;
import com.jme3.app.SimpleApplication;
import com.jme3.asset.plugins.ZipLocator;
import com.jme3.bullet.BulletAppState;
import com.jme3.bullet.collision.shapes.CapsuleCollisionShape;
import com.jme3.bullet.collision.shapes.CollisionShape;
import com.jme3.bullet.control.CharacterControl;
import com.jme3.bullet.control.RigidBodyControl;
import com.jme3.bullet.util.CollisionShapeFactory;
import com.jme3.input.KeyInput;
import com.jme3.input.controls.ActionListener;
import com.jme3.input.controls.KeyTrigger;
import com.jme3.light.AmbientLight;
import com.jme3.light.DirectionalLight;
import com.jme3.math.ColorRGBA;
import com.jme3.math.Vector3f;
import com.jme3.scene.Node;
import com.jme3.scene.Spatial;
/**
* Example 9 - How to make walls and floors solid.
* This collision code uses Physics and a custom Action Listener.
* @author normen, with edits by Zathras
*/
public class HelloCollision extends SimpleApplication
implements ActionListener {
private Spatial sceneModel;
private BulletAppState bulletAppState;
private RigidBodyControl landscape;
private CharacterControl player;
private Vector3f walkDirection = new Vector3f();
private boolean left = false, right = false, up = false, down = false;
//Temporary vectors used on each frame.
//They here to avoid instanciating new vectors on each frame
private Vector3f camDir = new Vector3f();
private Vector3f camLeft = new Vector3f();
public static void main(String[] args) {
HelloCollision app = new HelloCollision();
app.start();
}
public void simpleInitApp() {
/** Set up Physics */
bulletAppState = new BulletAppState();
stateManager.attach(bulletAppState);
//bulletAppState.setDebugEnabled(true);
// We re-use the flyby camera for rotation, while positioning is handled by physics
viewPort.setBackgroundColor(new ColorRGBA(0.7f, 0.8f, 1f, 1f));
flyCam.setMoveSpeed(100);
setUpKeys();
setUpLight();
// We load the scene from the zip file and adjust its size.
assetManager.registerLocator("town.zip", ZipLocator.class);
sceneModel = assetManager.loadModel("main.scene");
sceneModel.setLocalScale(2f);
// We set up collision detection for the scene by creating a
// compound collision shape and a static RigidBodyControl with mass zero.
CollisionShape sceneShape =
CollisionShapeFactory.createMeshShape(sceneModel);
landscape = new RigidBodyControl(sceneShape, 0);
sceneModel.addControl(landscape);
/**
* We set up collision detection for the player by creating
* a capsule collision shape and a CharacterControl.
* The CharacterControl offers extra settings for
* size, stepheight, jumping, falling, and gravity.
* We also put the player in its starting position.
*/
CapsuleCollisionShape capsuleShape = new CapsuleCollisionShape(1.5f, 6f, 1);
player = new CharacterControl(capsuleShape, 0.05f);
player.setJumpSpeed(20);
player.setFallSpeed(30);
// We attach the scene and the player to the rootnode and the physics space,
// to make them appear in the game world.
rootNode.attachChild(sceneModel);
bulletAppState.getPhysicsSpace().add(landscape);
bulletAppState.getPhysicsSpace().add(player);
// You can change the gravity of individual physics objects before or after
//they are added to the PhysicsSpace, but it must be set before MOVING the
//physics location.
player.setGravity(new Vector3f(0,-30f,0));
player.setPhysicsLocation(new Vector3f(0, 10, 0));
}
private void setUpLight() {
// We add light so we see the scene
AmbientLight al = new AmbientLight();
al.setColor(ColorRGBA.White.mult(1.3f));
rootNode.addLight(al);
DirectionalLight dl = new DirectionalLight();
dl.setColor(ColorRGBA.White);
dl.setDirection(new Vector3f(2.8f, -2.8f, -2.8f).normalizeLocal());
rootNode.addLight(dl);
}
/** We over-write some navigational key mappings here, so we can
* add physics-controlled walking and jumping: */
private void setUpKeys() {
inputManager.addMapping("Left", new KeyTrigger(KeyInput.KEY_A));
inputManager.addMapping("Right", new KeyTrigger(KeyInput.KEY_D));
inputManager.addMapping("Up", new KeyTrigger(KeyInput.KEY_W));
inputManager.addMapping("Down", new KeyTrigger(KeyInput.KEY_S));
inputManager.addMapping("Jump", new KeyTrigger(KeyInput.KEY_SPACE));
inputManager.addListener(this, "Left");
inputManager.addListener(this, "Right");
inputManager.addListener(this, "Up");
inputManager.addListener(this, "Down");
inputManager.addListener(this, "Jump");
}
/** These are our custom actions triggered by key presses.
* We do not walk yet, we just keep track of the direction the user pressed. */
public void onAction(String binding, boolean isPressed, float tpf) {
if (binding.equals("Left")) {
left = isPressed;
} else if (binding.equals("Right")) {
right= isPressed;
} else if (binding.equals("Up")) {
up = isPressed;
} else if (binding.equals("Down")) {
down = isPressed;
} else if (binding.equals("Jump")) {
if (isPressed) { player.jump(new Vector3f(0,20f,0));}
}
}
/**
* This is the main event loop--walking happens here.
* We check in which direction the player is walking by interpreting
* the camera direction forward (camDir) and to the side (camLeft).
* The setWalkDirection() command is what lets a physics-controlled player walk.
* We also make sure here that the camera moves with player.
*/
@Override
public void simpleUpdate(float tpf) {
camDir.set(cam.getDirection()).multLocal(0.6f);
camLeft.set(cam.getLeft()).multLocal(0.4f);
walkDirection.set(0, 0, 0);
if (left) {
walkDirection.addLocal(camLeft);
}
if (right) {
walkDirection.addLocal(camLeft.negate());
}
if (up) {
walkDirection.addLocal(camDir);
}
if (down) {
walkDirection.addLocal(camDir.negate());
}
player.setWalkDirection(walkDirection);
cam.setLocation(player.getPhysicsLocation());
}
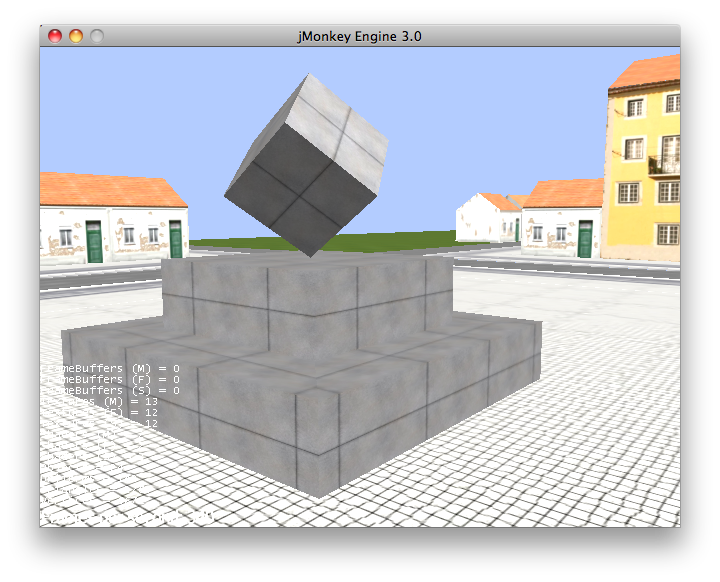
}Run the sample. You should see a town square with houses and a monument. Use the WASD keys and the mouse to navigate around with a first-person perspective. Run forward and jump by pressing W and Space. Note how you step over the sidewalk, and up the steps to the monument. You can walk in the alleys between the houses, but the walls are solid. Don’t walk over the edge of the world! 
Understanding the Code
Let’s start with the class declaration:
public class HelloCollision extends SimpleApplication
        implements ActionListener { ... }
You already know that SimpleApplication is the base class for all jME3 games. You make this class implement the ActionListener interface because you want to customize the navigational inputs later.
  private Spatial sceneModel;
  private BulletAppState bulletAppState;
  private RigidBodyControl landscape;
  private CharacterControl player;
  private Vector3f walkDirection = new Vector3f();
  private boolean left = false, right = false, up = false, down = false;

  //Temporary vectors used on each frame.
  //They here to avoid instanciating new vectors on each frame
  private Vector3f camDir = new Vector3f();
  private Vector3f camLeft = new Vector3f();
You initialize a few private fields:
-
The BulletAppState gives this SimpleApplication access to physics features (such as collision detection) supplied by jME3’s Bullet integration
-
The Spatial sceneModel is for loading an OgreXML model of a town.
-
You need a RigidBodyControl to make the town model solid.
-
The (invisible) first-person player is represented by a CharacterControl object.
-
The fields
walkDirectionand the four Booleans are used for physics-controlled navigation. -
camDir and camLeft are temporary vectors used later when computing the walkingDirection from the cam position and rotation
Let’s have a look at all the details:
Initializing the Game
As usual, you initialize the game in the simpleInitApp() method.
    viewPort.setBackgroundColor(new ColorRGBA(0.7f,0.8f,1f,1f));
    flyCam.setMoveSpeed(100);
    setUpKeys();
setUpLight();-
You set the background color to light blue, since this is a scene with a sky.
-
You repurpose the default camera control “flyCam” as first-person camera and set its speed.
-
The auxiliary method
setUpLights()adds your light sources. -
The auxiliary method
setUpKeys()configures input mappings–we will look at it later.
The Physics-Controlled Scene
Currently, jMonkeyEngine has two versions of Bullet Physics. A java port, jBullet, and JNI (native) implementation. Although both accomplish the same goal of adding physics to your game, how you interact with each is quite different. This tutorial and it’s examples use the JNI (native) implementation of physics. Which you choose is up to you.
For a detailed description of the separate jar files see this list.
How you initialize each is the same, only the methods used for manipulating objects is different. The first thing you do in every physics game is create a BulletAppState object. It gives you access to the jME3 Bullet integration which handles physical forces and collisions.
    bulletAppState = new BulletAppState();
    stateManager.attach(bulletAppState);
For the scene, you load the sceneModel from a zip file, and adjust the size.
    assetManager.registerLocator("town.zip", ZipLocator.class);
    sceneModel = assetManager.loadModel("main.scene");
    sceneModel.setLocalScale(2f);
The file town.zip is included as a sample model in the JME3 sources – you can Download the town.zip. (Optionally, use any OgreXML scene of your own.) For this sample, place the zip file in the application’s top level directory (that is, next to src/, assets/, build.xml).
    CollisionShape sceneShape =
      CollisionShapeFactory.createMeshShape((Node) sceneModel);
    landscape = new RigidBodyControl(sceneShape, 0);
    sceneModel.addControl(landscape);
    rootNode.attachChild(sceneModel);
To use collision detection, you add a RigidBodyControl to the sceneModel Spatial. The RigidBodyControl for a complex model takes two arguments: A Collision Shape, and the object’s mass.
-
JME3 offers a
CollisionShapeFactorythat precalculates a mesh-accurate collision shape for a Spatial. You choose to generate aCompoundCollisionShape(which has MeshCollisionShapes as its children) because this type of collision shape is optimal for immobile objects, such as terrain, houses, and whole shooter levels. -
You set the mass to zero since a scene is static and its mass is irrevelant.
-
Add the control to the Spatial to give it physical properties.
-
As always, attach the sceneModel to the rootNode to make it visible.
|
Remember to add a light source so you can see the scene. |
The Physics-Controlled Player
A first-person player is typically invisible. When you use the default flyCam as first-person cam, it does not even test for collisons and runs through walls. This is because the flyCam control does not have any physical shape assigned. In this code sample, you represent the first-person player as an (invisible) physical shape. You use the WASD keys to steer this physical shape around, while the physics engine manages for you how it walks along solid walls and on solid floors and jumps over solid obstacles. Then you simply make the camera follow the walking shape’s location – and you get the illusion of being a physical body in a solid environment seeing through the camera.
So let’s set up collision detection for the first-person player.
CapsuleCollisionShape capsuleShape = new CapsuleCollisionShape(1.5f, 6f, 1);Again, you create a CollisionShape: This time you choose a CapsuleCollisionShape, a cylinder with a rounded top and bottom. This shape is optimal for a person: It’s tall and the roundness helps to get stuck less often on obstacles.
-
Supply the CapsuleCollisionShape constructor with the desired radius and height of the bounding capsule to fit the shape of your character. In this example the character is 1.5f units wide, and 6f units tall.
-
The final integer argument specifies the orientation of the cylinder: 1 is the Y-axis, which fits an upright person. For animals which are longer than high you would use 0 or 2 (depending on how it is rotated).
player = new CharacterControl(capsuleShape, 0.05f);|
“Does that CollisionShape make me look fat?” If you ever get confusing physics behaviour, remember to have a look at the collision shapes. Add the following line after the bulletAppState initialization to make the shapes visible: |
Now you use the CollisionShape to create a CharacterControl that represents the first-person player. The last argument of the CharacterControl constructor (here .05f) is the size of a step that the character should be able to surmount.
    player.setJumpSpeed(20);
    player.setFallSpeed(30);
    player.setGravity(new Vector3f(0,-30f,0));
Apart from step height and character size, the CharacterControl lets you configure jumping, falling, and gravity speeds. Adjust the values to fit your game situation. There are some important nuances when setting these variable that are explained in greater detail in the onAction() topic later.
player.setPhysicsLocation(new Vector3f(0, 10, 0));Finally we put the player in its starting position and update its state – remember to use setPhysicsLocation() instead of setLocalTranslation() now, since you are dealing with a physical object.
|
You can set the gravity before or after adding the object to the physics space, but gravity must be set BEFORE moving the physics location. |
PhysicsSpace
Remember, in physical games, you must register all solid objects (usually the characters and the scene) to the PhysicsSpace!
    bulletAppState.getPhysicsSpace().add(landscape);
    bulletAppState.getPhysicsSpace().add(player);
The invisible body of the character just sits there on the physical floor. It cannot walk yet – you will deal with that next.
Navigation
The default camera controller cam is a third-person camera. JME3 also offers a first-person controller, flyCam, which we use here to handle camera rotation. The flyCam control moves the camera using setLocation().
However, you must redefine how walking (camera movement) is handled for physics-controlled objects: When you navigate a non-physical node (e.g. the default flyCam), you simply specify the target location. There are no tests that prevent the flyCam from getting stuck in a wall! When you move a PhysicsControl, you want to specify a walk direction instead. Then the PhysicsSpace can calculate for you how far the character can actually move in the desired direction – or whether an obstacle prevents it from going any further.
In short, you must re-define the flyCam’s navigational key mappings to use setWalkDirection() instead of setLocalTranslation(). Here are the steps:
1. inputManager
In the simpleInitApp() method, you re-configure the familiar WASD inputs for walking, and Space for jumping.
private void setUpKeys() {
    inputManager.addMapping("Left", new KeyTrigger(KeyInput.KEY_A));
    inputManager.addMapping("Right", new KeyTrigger(KeyInput.KEY_D));
    inputManager.addMapping("Up", new KeyTrigger(KeyInput.KEY_W));
    inputManager.addMapping("Down", new KeyTrigger(KeyInput.KEY_S));
    inputManager.addMapping("Jump", new KeyTrigger(KeyInput.KEY_SPACE));
    inputManager.addListener(this, "Left");
    inputManager.addListener(this, "Right");
    inputManager.addListener(this, "Up");
    inputManager.addListener(this, "Down");
    inputManager.addListener(this, "Jump");
}
You can move this block of code into an auxiliary method setupKeys() and call this method from simpleInitApp()– to keep the code more readable.
2. onAction()
Remember that this class implements the ActionListener interface, so you can customize the flyCam inputs. The ActionListener interface requires you to implement the onAction() method: You re-define the actions triggered by navigation key presses to work with physics.
  public void onAction(String binding, boolean value, float tpf) {
    if (binding.equals("Left")) {
      if (value) { left = true; } else { left = false; }
    } else if (binding.equals("Right")) {
      if (value) { right = true; } else { right = false; }
    } else if (binding.equals("Up")) {
      if (value) { up = true; } else { up = false; }
    } else if (binding.equals("Down")) {
      if (value) { down = true; } else { down = false; }
    } else if (binding.equals("Jump")) {
      if (isPressed) { player.jump(new Vector3f(0,20f,0));}
    }
  }
The only movement that you do not have to implement yourself is the jumping action. The call player.jump(new Vector3f(0,20f,0)) is a special method that handles a correct jumping motion for your PhysicsCharacterNode.
Remember when we set this variable earlier?
player.setJumpSpeed(20);Here, player.setJumpSpeed(20) has no visible effect because its value is overridden when jump(new Vector3f(0,20f,0) is invoked in the onAction(). If you were to replace jump(new Vector3f(0,20f,0) with jump(new Vector3f(0f,60f,0f)), then the player jumps faster and higher, as would be expected.
If you were using the “jBullet” library for physics, you would manipulate the jump speed and calling jump would have the same effect.
player.setJumpSpeed(60);
player.jump();
This is just one of the differences you see when using “jBullet” vs the “Native” bullet implementations.
Another is when using the setFallSpeed() method. This sets the maximum fall speed, what’s sometimes called the terminal velocity. In the town setting, the easiest way to fall faster while jumping is to supply larger values to both setFallSpeed() and jump(). For instance, with setFallSpeed(300f) and jump(new Vector3f(0,200f,0)), the player reaches a speed of 200 wu/second just before landing. Using jBullet, just setting the fall speed accomplishes the same effect.
For all other directions: Every time the user presses one of the WASD keys, you keep track of the direction the user wants to go, by storing this info in four directional Booleans. No actual walking happens here yet. The update loop is what acts out the directional info stored in the booleans, and makes the player move, as shown in the next topic, “setWalkDirection()”.
3. setWalkDirection()
Previously in the onAction() method, you have collected the info in which direction the user wants to go in terms of “forward” or “left”. In the update loop, you repeatedly poll the current rotation of the camera. You calculate the actual vectors to which “forward” or “left” corresponds in the coordinate system.
This last and most important code snippet goes into the simpleUpdate() method.
 public void simpleUpdate(float tpf) {
        camDir.set(cam.getDirection()).multLocal(0.6f);
        camLeft.set(cam.getLeft()).multLocal(0.4f);
        walkDirection.set(0, 0, 0);
        if (left) {
            walkDirection.addLocal(camLeft);
        }
        if (right) {
            walkDirection.addLocal(camLeft.negate());
        }
        if (up) {
            walkDirection.addLocal(camDir);
        }
        if (down) {
            walkDirection.addLocal(camDir.negate());
        }
        player.setWalkDirection(walkDirection);
        cam.setLocation(player.getPhysicsLocation());
    }
This is how the walking is triggered:
-
Initialize the vector
walkDirectionto zero. This is where you want to store the calculated walk direction.-
Add to
walkDirectionthe recent motion vectors that you polled from the camera. This way it is posible for a character to move forward and to the left simultaneously, for example! -
This one last line does the “walking” magic:
player.setWalkDirection(walkDirection);Always use
setWalkDirection()to make a physics-controlled object move continuously, and the physics engine handles collision detection for you. -
Make the first-person camera object follow along with the physics-controlled player:
cam.setLocation(player.getPhysicsLocation());
-
|
Again, do not use |
Conclusion
You have learned how to load a “solid” physical scene model and walk around in it with a first-person perspective.
You learned to speed up the physics calculations by using the CollisionShapeFactory to create efficient CollisionShapes for complex Geometries. You know how to add PhysicsControls to your collidable geometries and you register them to the PhysicsSpace. You also learned to use player.setWalkDirection(walkDirection) to move collision-aware characters around, and not setLocalTranslation().
See also:
-
How to load models and scenes: Hello Asset, Scene Explorer, Scene Composer.
-
To learn more about complex physics scenes, where several mobile physical objects bump into each other, read Hello Physics.
-
FYI, there are simpler collision detection solutions without physics, too. Have a look at jme3test.collision.TestTriangleCollision.java.