jMonkeyEngine SDK: Post-Processor Filters
Filters are used for scene-wide effects such as glow, fog, blur. The SDK lets you create a file storing combinations of filters. You can preview the filter settings on a loaded scene in the SDK. You can load them into your application (add them to the viewPort) to activate your preconfigured set of several filters in one step.
Creating Filters
To create a new filter:
-
In the Projects window, right-click Assets→Effects.
-
Select File→New File…
-
Select Filter→Empty FilterPostProcessor File in the New File Wizard.
-
An empty filter file appears in the Assets→Effects directory.
-
-
Double-click the created file.
-
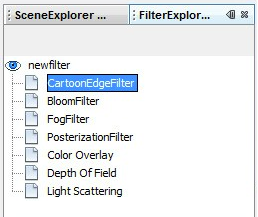
The file opens in the FilterExplorer window.
-
Editing Filters
To add filters or modify existing filters
-
Double-click a j3f file to open it in the FilterExplorer window.
-
Right-click the j3f file’s root node to add a filter.
-
Added filters are listed under the filter’s root node.
-
-
Open the Properties window and select a filter in the FilterExplorer. Configure filter options like intensity etc.
View the filter in the SceneComposer to see what you are doing:
Viewing Filters

To see a loaded filter
-
Open a model or scene in the SceneComposer.
-
Double-click a j3f file to open it in the FilterExplorer window.
-
Press the “show filter” button in the OpenGL window.
Loading filters in a game
To load a filter in a game (that is, to add it to your game’s viewport), add the following lines to your game’s simpleInit() method (or some other place):
FilterPostProcessor processor = (FilterPostProcessor) assetManager.loadAsset("Filters/MyFilter.j3f");
viewPort.addProcessor(processor);