Shapes
The simplest type of Meshes are the built-in JME Shapes. You can create Shapes without using the AssetManager.
3D shapes

-
com.jme3.scene.shape.Box – A cube or cuboid. Single-sided Quad faces (outside only).
-
com.jme3.scene.shape.StripBox – A cube or cuboid. Solid filled faces (inside and outside).
-
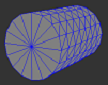
com.jme3.scene.shape.Cylinder – A disk or pillar.
-
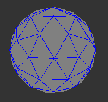
com.jme3.scene.shape.Sphere – A ball or elipsoid.
-
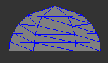
com.jme3.scene.shape.Dome – A semi-sphere, e.g. SkyDome.
-
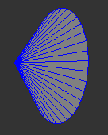
For a cone, set the Dome’s radialSamples>4 and planes=2.
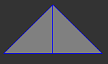
-
For a pyramid, set the Dome’s radialSamples=4 and planes=2.
-
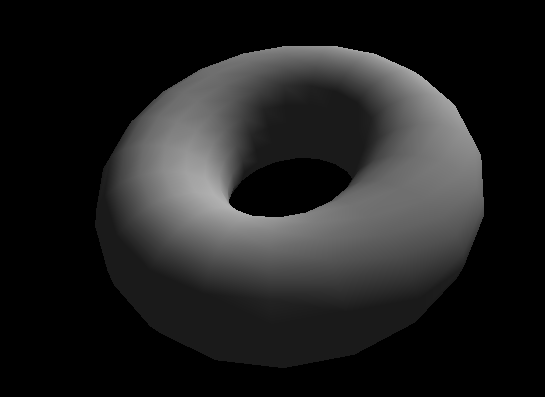
com.jme3.scene.shape.Torus – An single-holed torus or “donut”.
-
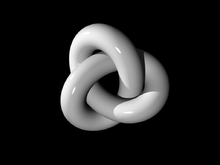
com.jme3.scene.shape.PQTorus – A parameterized torus. A PQ-Torus looks like a donut knotted into spirals.
-
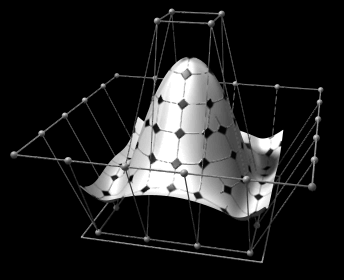
com.jme3.scene.shape.Surface – A curved surface (called NURBS) described by knots, weights and control points. Compare with shape.Curve.
Non-3D shapes
-
com.jme3.scene.shape.Quad – A flat 2D rectangle (single-sided, center is in bottom-left corner)
-
com.jme3.scene.shape.Line – A straight 1D line defined by a start and end point.
-
com.jme3.scene.shape.Curve – A curved 1D spline. Compare with shape.Surface.
com.jme3.math versus com.jme3.shape?
Do not mix up these visible com.jme3.shapes with similarly named classes from the com.jme3.math package. Choose the right package when letting your IDE fill in the import statements!
-
com.jme3.math.Line – is invisible, has a direction, goes through a point, infinite length.
-
com.jme3.math.Ray – is invisible, has a direction and start point, but no end.
-
com.jme3.math.Spline – is an invisible curve.
-
etc
These maths objects are invisible and are used for collision testing (ray casting) or to describe motion paths. They cannot be wrapped into a Geometry.
Usage
Basic Usage
To add a shape to the scene:
-
Create the base mesh shape.
-
Wrap the mesh into a Geometry.
-
Assign a Material to the Geometry.
-
Attach the Geometry to the rootNode to make it visible.
|
Create one static shape as mesh and use it in several geometries, or clone() the geometries. |
Complex Shapes
You can compose more complex custom Geometries out of simple Shapes. Think of the buildings in games like Angry Birds, or the building blocks in Second Life (prims) and in Tetris (Tetrominos).
-
Create a Node. By default it is located at the origin (0/0/0) – leave the Node there for now.
-
Create your shapes and wrap each into a Geometry, as just described.
-
Attach each Geometry to the Node.
-
Arrange the Geometries around the Node (using
setLocalTranslation()) so that the Node is in the center of the new constellation. The central Node is the pivot point for transformations (move/scale/rotate). -
Move the pivot Node to its final location in the scene. Moving the pivot Node moves the attached constellation of Geometries with it.
The order is important: First arrange around origin, then transform. Otherwise, transformations are applied around the wrong center (pivot). Of course, you can attach your constellation to other pivot Nodes to create even more complex shapes (a chair, a furnished room, a house, a city, …), but again, arrange them around the origin first before you transform them. Obviously, such composed Geometries are simpler than hand-sculpted meshes from a mesh editor.
Code Examples
Create the Mesh shape:
Sphere mesh = new Sphere(32, 32, 10, false, true);Dome mesh = new Dome(Vector3f.ZERO, 2, 4, 1f,false); // PyramidDome mesh = new Dome(Vector3f.ZERO, 2, 32, 1f,false); // ConeDome mesh = new Dome(Vector3f.ZERO, 32, 32, 1f,false); // Small hemisphereDome mesh = new Dome(Vector3f.ZERO, 32, 32, 1000f,true); // SkyDomePQTorus mesh = new PQTorus(5,3, 2f, 1f, 32, 32); // Spiral torusPQTorus mesh = new PQTorus(3,8, 2f, 1f, 32, 32); // Flower torusUse one of the above examples together with the following geometry in a scene:
Geometry geom = new Geometry("A shape", mesh); // wrap shape into geometry
Material mat = new Material(assetManager,
    "Common/MatDefs/Misc/ShowNormals.j3md");   // create material
geom.setMaterial(mat);                         // assign material to geometry
// if you want, transform (move, rotate, scale) the geometry.
rootNode.attachChild(geom);                    // attach geometry to a node
See also
-
Optimization – The GeometryBatchFactory class combines several of your shapes with the same texture into one mesh with one texture.