TerraMonkey - The jMonkeyEngine Terrain System
Overview
TerraMonkey is a GeoMipMapping quad tree of terrain tiles that supports real time editing and texture splatting. That’s a mouth full! Lets look at each part:
-
GeoMipMapping: a method of changing the level of detail (LOD) of geometry tiles based on how far away they are from the camera. Between the edges of two tiles, it will seam those edges together so you don’t get gaps or holes. For an in-depth read on how it works, read Fast Terrain Rendering Using Geometrical MipMapping .
-
Quad Tree: The entire terrain structure is made up of TerrainPatches (these hold the actual meshes) as leaves in a quad tree (TerrainQuad). TerrainQuads are subdivided by 4 until they reach minimum size, then a TerrainPatch is created, and that is where the actual geometry mesh lives. This allows for fast culling of the terrain that you can’t see.
-
Splatting: The ability to paint multiple textures onto your terrain. What differs here from JME2 is that this is all done in a shader, no more render passes. So it performs much faster.
-
Real-time editing: TerraMonkey terrains are editable in jMonkeyEngine SDK, and you are able to modify them in real time, for example by raising and lowering the terrain.
Geo Mip Mapping
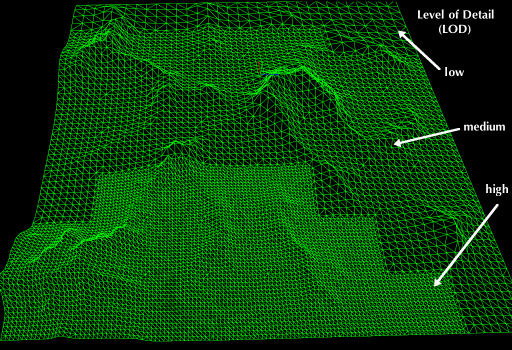
You have seen GeoMipMapping implemented in games before. This is where the farther away terrain has fewer polygons, and as you move closer, more polygons fill in. The whole terrain is divided into a grid of patches, and each one has its own level of detail (LOD). The GeoMipMapping algorithm looks at each patch, and its neighbours, to determine how to render the geometry. It will seam the edges between two patches with different LOD.
GeoMipMapping often leads to “popping” where you see the terrain switch from one LOD to another. TerraMonkey has been designed so you can swap out different LOD calculation algorithms based on what will look best for your game. You can do this with the LodCalculator interface.
GeoMipMapping in TerraMonkey has been split into several parts: the terrain quad tree, and the LODGeomap. The geomap deals with the actual LOD and seaming algorithm. So if you want a different data structure for your terrain system, you can re-use this piece of code. The quad tree (TerrainQuad and TerrainPatch) provide a means to organize the LODGeomaps, notify them of their neighbour’s LOD change, and to update the geometry when the LOD does change. To change the LOD it does this by changing the index buffer of the triangle strip, so the whole geometry doesn’t have to be re-loaded onto the video card. If you are eager for more detail on how GeoMipMapping works read: Fast Terrain Rendering Using Geometrical MipMapping .
Terrain Quad Tree
TerraMonkey is a quad tree. Each node is a TerrainQuad, and each leaf is a TerrainPatch. A TerrainQuad has either 4 child TerrainQuads, or 4 child TerrainPatches. The TerrainPatch holds the actual mesh geometry. This structure is almost exactly the same as JME2’s TerrainPage system. Except now each leaf has a reference to its neighbours, so it doesn’t ever have to traverse the tree to get them.
Texture Splatting
When you ‘slap’ a texture on a mesh, the whole mesh looks the same. For big meshes (such as terrains) that is undesirable because it looks very boring (your whole landscape would be all rock, or all grass, or all sand). Texture Splatting is a technique that lets you “paint” several textures into one combined texure. Each of the splat textures has an opacity value so you can define where it is visible in the final overall texture.
The default material for TerraMonkey is TerrainLighting.j3md. This material combines several texture maps to produce the final custom texture. Remember, Diffuse Maps are the main textures that define the look; optionally, each Diffuse Map can be enhanced with a Normal Map; Alpha Maps describe the opacity of each Diffuse Map used (one color –red, green, blue, or alpha– stands for one Diffuse Map’s opacity); Glow and Specular Maps define optional effects.
|
We recommend to create and edit Splat Textures for terrains visually in the jMonkeyEngine SDK, and not do it manually. If you are simply curious about how the SDK’s terrain texture plugin works, or if you indeed want to generate materials manually, then read on for the implementation details. |
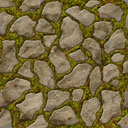
The Diffuse Map of one of the terrain textures depicts the colors of a paved surface. |
|
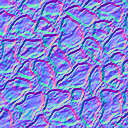
The Normal Map of one of the terrain textures depicts the bumpiness of a paved surface. |
|
A heightmap encodes the topological highs and lows of the terrain. |
|
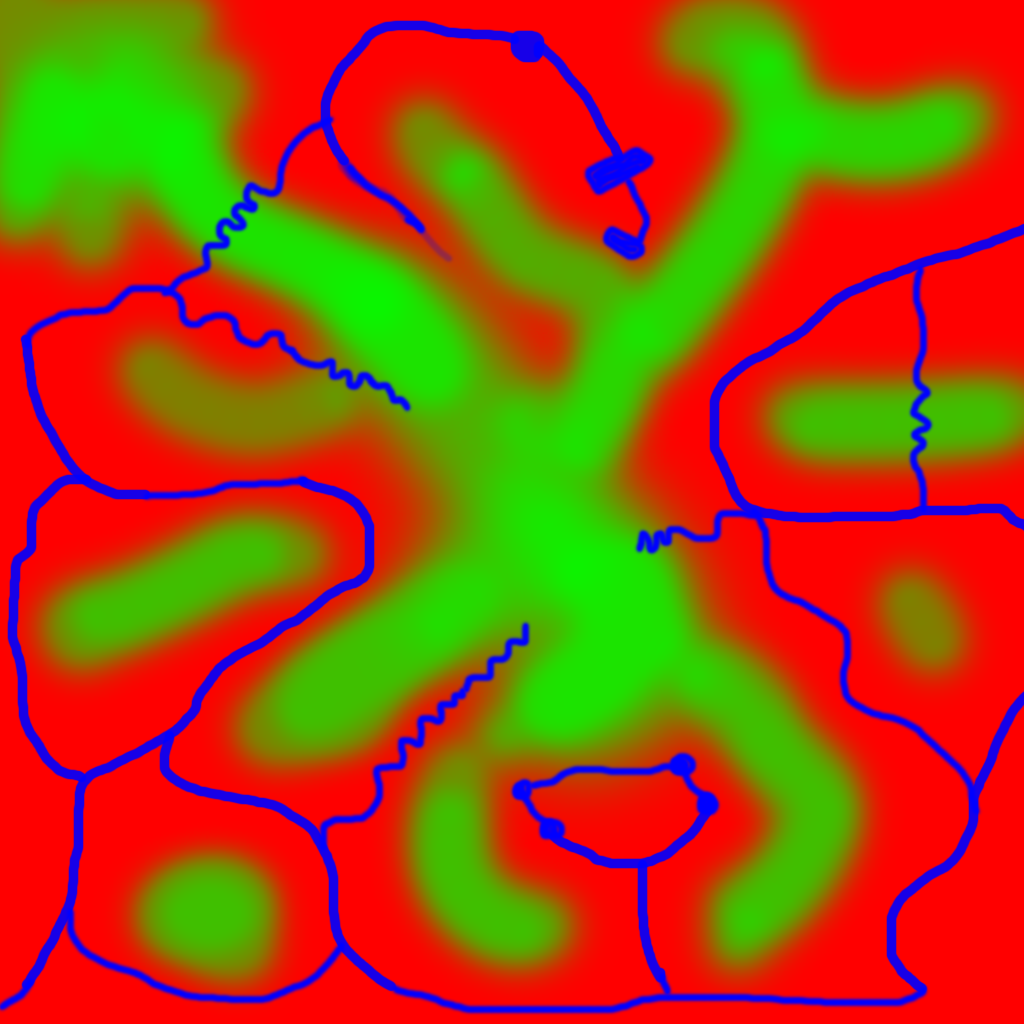
An alpha map can describe where 4 textures are painted onto the terrain. |
|

Here are the names of TerrainLighting.j3md’s material properties:
-
1-3 Alpha Maps
-
AlphaMap -
AlphaMap_1 -
AlphaMap_2
-
-
12 Diffuse and/or Normal Maps (either in 6 pairs, or 12 stand-alone Diffuse Maps)
-
DiffuseMap,DiffuseMap_0_scale,NormalMap -
DiffuseMap_1,DiffuseMap_1_scale,NormalMap_1 -
DiffuseMap_2,DiffuseMap_2_scale,NormalMap_2 -
DiffuseMap_3,DiffuseMap_3_scale,NormalMap_3 -
DiffuseMap_4,DiffuseMap_4_scale,NormalMap_4 -
…
-
DiffuseMap_11,DiffuseMap_11_scale,NormalMap_11
-
-
Light maps
-
GlowMap -
SpecularMap
-
|
|
OpenGL supports a maximum of 16 samplers in any given shader. This means you can only use a subset of material properties at the same time if you use the terrain’s default lighting shader (TerrainLighting.j3md)!
Adhere to the following constraints:
-
1-12 Diffuse Maps. One Diffuse Map is the minimum!
-
1-3 Alpha Maps. For each 4 Diffuse Maps, you need 1 more Alpha Map!
-
0-6 Normal Maps. Diffuse Maps & Normal Maps always come in pairs!
-
0 or 1 Glow Map
-
0 or 1 Specular Map.
-
The sum of all textures used must be 16, or less.
Here are some common examples what this means:
-
3 Alpha + 11 Diffuse + 1 Normal.
-
3 Alpha + 11 Diffuse + 1 Glow.
-
3 Alpha + 11 Diffuse + 1 Specular.
-
3 Alpha + 10 Diffuse + 3 Normal.
-
3 Alpha + 10 Diffuse + 1 Normal + 1 Glow + 1 Specular.
-
2 Alpha + 8 Diffuse + 6 Normal.
-
2 Alpha + 6 Diffuse + 6 Normal + 1 Glow + 1 Specular.
-
1 Alpha + 3 Diffuse + 3 Normal + 1 Glow + 1 Specular (rest unused)
You can hand-paint Alpha, Diffuse, Glow, and Specular maps in a drawing program, like Photoshop. Define each splat texture in the Alpha Map in either Red, Green, Blue, or Alpha (=RGBA). The JmeTests project bundled in the SDK includes some image files that show you how this works. The example images show a terrain heightmap next to its Alpha Map (which has been prepare for 3 Diffuse Maps), and one examplary Diffuse/Normal Map pair.
Code Sample: Terrain.j3md
This example shows the simpler material definition Terrain.j3md, which only supports 1 Alpha Map, 3 Diffuse Maps, 3 Normal Maps, and does not support Phong illumination. It makes the exmaple shorter – TerrainLighting.j3md works accordingly (The list of material properties see above. Links to extended sample code see above.)
First, we load our textures and the heightmap texture for the terrain
// Create material from Terrain Material Definition
matRock = new Material(assetManager, "Common/MatDefs/Terrain/Terrain.j3md");
// Load alpha map (for splat textures)
matRock.setTexture("Alpha", assetManager.loadTexture("Textures/Terrain/splat/alphamap.png"));
// load heightmap image (for the terrain heightmap)
Texture heightMapImage = assetManager.loadTexture("Textures/Terrain/splat/mountains512.png");
// load grass texture
Texture grass = assetManager.loadTexture("Textures/Terrain/splat/grass.jpg");
grass.setWrap(WrapMode.Repeat);
matRock.setTexture("Tex1", grass);
matRock.setFloat("Tex1Scale", 64f);
// load dirt texture
Texture dirt = assetManager.loadTexture("Textures/Terrain/splat/dirt.jpg");
dirt.setWrap(WrapMode.Repeat);
matRock.setTexture("Tex2", dirt);
matRock.setFloat("Tex2Scale", 32f);
// load rock texture
Texture rock = assetManager.loadTexture("Textures/Terrain/splat/road.jpg");
rock.setWrap(WrapMode.Repeat);
matRock.setTexture("Tex3", rock);
matRock.setFloat("Tex3Scale", 128f);
We create the heightmap from the heightMapImage.
AbstractHeightMap heightmap = null;
heightmap = new ImageBasedHeightMap(heightMapImage.getImage(), 1f);
heightmap.load();
Next we create the actual terrain.
-
The terrain tiles are 65x65.
-
The total size of the terrain is 513x513, but it can easily be up to 1025x1025.
-
It uses the heightmap to generate the height values.
terrain = new TerrainQuad("terrain", 65, 513, heightmap.getHeightMap());
terrain.setMaterial(matRock);
terrain.setLocalScale(2f, 1f, 2f); // scale to make it less steep
List<Camera> cameras = new ArrayList<>();
cameras.add(getCamera());
TerrainLodControl control = new TerrainLodControl(terrain, cameras);
terrain.addControl(control);
rootNode.attachChild(terrain);|
As an alternative to an image-based height map, you can also generate a Hill hightmap: |