Light and Shadow
Light and Shadow are two separate things in 3D engines, although we percieve them together in real life:
-
Lighting means that an object is brighter on the side facing the light direction, and darker on the backside. Computationally, this is relatively easy.
-
Lighting does not mean that objects cast a shadow on the floor or other objects: Activating shadow processing is an additional step described here. Since casting shadows has an impact on performance, drop shadows and ambient occlusion shading are not activated by default.
|
A light source with a direction or location is required for all Geometries with Lighting.j3md-based Materials. An ambient light is not sufficient. In a scene with no appropriate light sources, Geometries with Lighting.j3md-based Materials do not render. Only Geometries with Unshaded.j3md-based Materials are visible independent of any light sources. |
Light Sources and Colors
You can add several types of light sources to a scene using rootNode.addLight(mylight).
The available light sources in com.jme3.light are:
-
SpotLight
-
PointLight
-
AmbientLight
-
DirectionalLight
You control the color and intensity of each light source. Typically you set the color to white (new ColorRGBA(1.0f,1.0f,1.0f,1.0f) or ColorRGBA.White), which makes all scene elements appear in their natural color.
You can choose to use lights in other colors than white, or darker colors. This influences the scene’s atmosphere and will make the scene appear colder (e.g. ColorRGBA.Cyan) or warmer (ColorRGBA.Yellow), brighter (higher values) or darker (lower values).
You can get a list of all lights added to a Spatial by calling getWorldLightList() (includes inherited lights) or getLocalLightList() (only directly added lights), and iterating over the result.
PointLight
A PointLight has a location and shines from there in all directions as far as its radius reaches. The light intensity decreases with increased distance from the light source. A PointLight can be used to cast shadows along with a PointLightShadowRenderer (see the Casting Shadows section)
Typical example: Lamp, lightbulb, torch, candle.
PointLight lamp_light = new PointLight();
lamp_light.setColor(ColorRGBA.Yellow);
lamp_light.setRadius(4f);
lamp_light.setPosition(new Vector3f(lamp_geo.getLocalTranslation()));
rootNode.addLight(lamp_light);
DirectionalLight

A DirectionalLight has no position, only a direction. It sends out parallel beams of light and is considered “infinitely” far away. You typically have one directional light per scene. A DirectionalLight can be used together with shadows.
Typically example: Sun light.
DirectionalLight sun = new DirectionalLight();
sun.setColor(ColorRGBA.White);
sun.setDirection(new Vector3f(-.5f,-.5f,-.5f).normalizeLocal());
rootNode.addLight(sun);
SpotLight
A SpotLight sends out a distinct beam or cone of light. A SpotLight has a direction, a position, distance (range) and two angles. The inner angle is the central maximum of the light cone, the outer angle the edge of the light cone. Everything outside the light cone’s angles is not affected by the light.
Typical Example: Flashlight
SpotLight spot = new SpotLight();
spot.setSpotRange(100f);                           // distance
spot.setSpotInnerAngle(15f * FastMath.DEG_TO_RAD); // inner light cone (central beam)
spot.setSpotOuterAngle(35f * FastMath.DEG_TO_RAD); // outer light cone (edge of the light)
spot.setColor(ColorRGBA.White.mult(1.3f));         // light color
spot.setPosition(cam.getLocation());               // shine from camera loc
spot.setDirection(cam.getDirection());             // shine forward from camera loc
rootNode.addLight(spot);
If you want the spotlight to follow the flycam, repeat the setDirection(…) and setPosition(…) calls in the update loop, and kee syncing them with the camera position and direction.
AmbientLight
An AmbientLight simply influences the brightness and color of the scene globally. It has no direction and no location and shines equally everywhere. An AmbientLight does not cast any shadows, and it lights all sides of Geometries evenly, which makes 3D objects look unnaturally flat; this is why you typically do not use an AmbientLight alone without one of the other lights.
Typical example: Regulate overall brightness, tinge the whole scene in a warm or cold color.
AmbientLight al = new AmbientLight();
al.setColor(ColorRGBA.White.mult(1.3f));
rootNode.addLight(al);|
You can increase the brightness of a light source gradually by multiplying the light color to values greater than 1.0f. |
Light Follows Spatial
You can use a com.jme3.scene.control.LightControl to make a SpotLight or PointLight follow a Spatial. This can be used for a flashlight being carried by a character, or for car headlights, or an aircraft’s spotlight, etc.
PointLight myLight = new PointLight();
rootNode.addLight(myLight);
LightControl lightControl = new LightControl(myLight);
spatial.addControl(lightControl); // this spatial controls the position of this light.
Obviously, this does not apply to AmbientLights, which have no position.
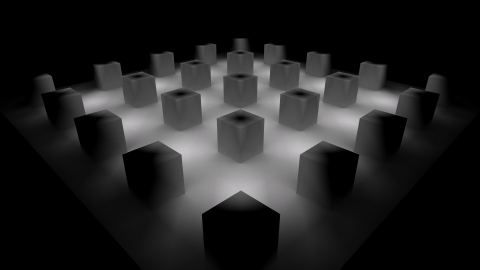
Casting Shadows
For each type of non-ambient light source, JME3 implements two ways to simulate geometries casting shadows on other geometries:
-
a shadow renderer (which you apply to a viewport) and
-
a shadow filter (which you can add to a viewport’s filter post-processor).
| light source class | shadow renderer class | shadow filter class |
|---|---|---|
DirectionalLight |
DirectionalLightShadowRenderer |
DirectionalLightShadowFilter |
PointLight |
PointLightShadowRenderer |
PointLightShadowFilter |
SpotLight |
SpotLightShadowRenderer |
SpotLightShadowFilter |
AmbientLight |
(not applicable) |
(not applicable) |
You only need one shadow simulation per light source: if you use shadow rendering, you won’t need a shadow filter and vice versa. Which way is more efficient depends partly on the complexity of your scene. All six shadow simulation classes have similar interfaces, so once you know how to use one, you can easily figure out the rest.
Shadow calculations (cast and receive) have a performance impact, so use them sparingly. With shadow renderers, you can turn off shadow casting and/or shadow receiving for individual geometries, for portions of the scene graph, or for the entire scene:
spatial.setShadowMode(ShadowMode.Inherit);     // This is the default setting for new spatials.
rootNode.setShadowMode(ShadowMode.Off);        // Disable shadows for the whole scene, except where overridden.
wall.setShadowMode(ShadowMode.CastAndReceive); // The wall can cast shadows and also receive them.
floor.setShadowMode(ShadowMode.Receive);       // Any shadows cast by the floor would be hidden by it.
airplane.setShadowMode(ShadowMode.Cast);       // There's nothing above the airplane to cast shadows on it.
ghost.setShadowMode(ShadowMode.Off);           // The ghost is translucent: it neither casts nor receives shadows.
Both shadow renderers and shadow filters use shadow modes to determine which objects can cast shadows. However, only the shadow renderers pay attention to shadow modes when determining which objects receive shadows. With a shadow filter, shadow modes have no effect on which objects receive shadows.
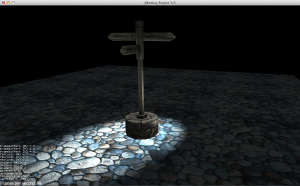
Here’s a sample application which demonstrates both DirectionalLightShadowRenderer and DirectionalLightShadowFilter:
Here is the key code fragment:
DirectionalLight sun = new DirectionalLight();
sun.setColor(ColorRGBA.White);
sun.setDirection(cam.getDirection());
rootNode.addLight(sun);

/* Drop shadows */
final int SHADOWMAP_SIZE=1024;
DirectionalLightShadowRenderer dlsr = new DirectionalLightShadowRenderer(assetManager, SHADOWMAP_SIZE, 3);
dlsr.setLight(sun);
viewPort.addProcessor(dlsr);

DirectionalLightShadowFilter dlsf = new DirectionalLightShadowFilter(assetManager, SHADOWMAP_SIZE, 3);
dlsf.setLight(sun);
dlsf.setEnabled(true);
FilterPostProcessor fpp = new FilterPostProcessor(assetManager);
fpp.addFilter(dlsf);
viewPort.addProcessor(fpp);
Constructor arguments:
-
Your AssetManager object.
-
Size of the rendered shadow maps, in pixels per side (512, 1024, 2048, etc…).
-
The number of shadow maps rendered (more shadow maps = better quality, but slower).
Properties you can set:
-
setDirection(Vector3f) – the direction of the light
-
setLambda(0.65f) – to reduce the split size
-
setShadowIntensity(0.7f) – shadow darkness (1=black, 0=invisible)
-
setShadowZextend(float) – distance from camera to which shadows will be computed
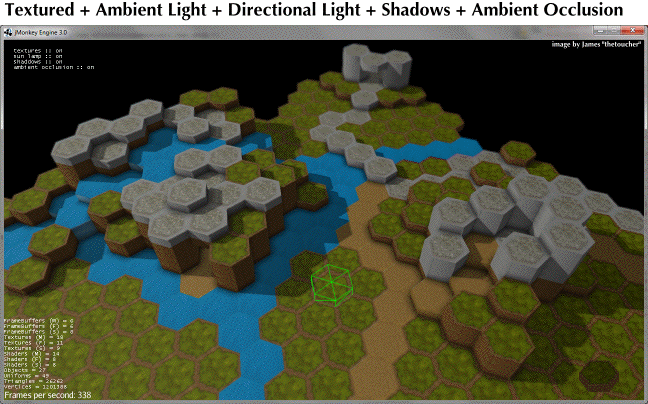
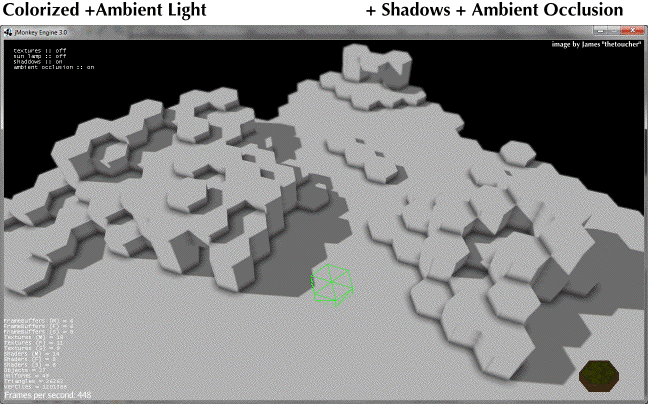
Screen Space Ambient Occlusion
Full sample code
-
TestSSAO.java – Screen-Space Ambient Occlusion shadows
-
TestTransparentSSAO.java – Screen-Space Ambient Occlusion shadows plus transparancy
Ambient Occlusion refers to the shadows which nearby objects cast on each other under an ambient lighting. Screen Space Ambient Occlusion (SSAO) approximates how light radiates in real life.
In JME3, SSAO is implemented by adding an instance of com.jme3.post.SSAOFilter to a viewport which already simulates shadows using another method such as DirectionalLightShadowRenderer.
FilterPostProcessor fpp = new FilterPostProcessor(assetManager);
SSAOFilter ssaoFilter = new SSAOFilter(12.94f, 43.92f, 0.33f, 0.61f);
fpp.addFilter(ssaoFilter);
viewPort.addProcessor(fpp);